
All images in this post were edited with Reverie from the Dark & Moody Millennium Preset Collection!
Disney World Photography Tips
Are you planning a Disney Vacation and wanting to return home with some fantastic photos to remember your trip?
Of course you do, but hoping for great Disney family photos and actually coming home with some great photo gems requires careful planning!
Keep in mind the Disney parks have a Photopass add-on option that you can purchase, but that will add another $69-$199 to the cost of your trip. It’s not only an additional cost for an already expensive vacation, but you may miss out on some of the more interesting photo opportunities and awesome candid shots.

1. Bring the Right Camera and Lens
When you visit one of the Disney parks, I recommend bringing your widest and/or most versatile lens.
I brought my 35mm Sigma Art lens to Disneyland mainly because it’s wide (without being too wide), and it also focuses like a champ. I rarely get an out-of-focus image with this lens. It’s also small, lightweight, and can easily be worn all day and tucked under my arm for protection.

2. Dress Comfortably and Cute
What should you wear at Disney? This may be something you haven’t thought of, but what you and your family wear in a photo can make or break the images. Unfortunately, Disney definitely requires comfort and can’t be planned like a typical shoot. But you can certainly think ahead and ensure everyone looks cute and comfortable in your photos.
Like with a standard shoot, well-fitting clothes are always better, and layering your look can also be flattering. Your hair and makeup can be nicely done, and clean shoes are a plus.
Fun Disney shirts are still a hit. I bought ours online before the trip so they could be washed and I could make sure they fit well before we arrived. AVOID old dirty athletic shoes, bulky sweaters tied around your waist, and neon colors.

3. Wear Your Camera
Everyone wants to know what I do with my camera all day long at Disney.
The answer is simple; I WEAR IT! ALL DAY LONG!! It never comes off my body unless I’m handing it to the hubby to get a shot with me included.
I wear it on rides, walking, eating lunch, and even in the bathroom. I have been on every single ride in the park with my camera. It is doable, and nothing has ever even remotely come close to harming it.
This brings me to my next recommendation: you will need a comfortable camera strap. I prefer a wide cloth-type camera strap that reminds me of a scarf. It won’t rub or get sticky like leather or synthetic fabrics can, and it fans out to distribute weight across my shoulders. I wear it relatively short, meaning the camera lays directly at my elbow level, so my arm is always protecting and keeping it from flopping around.
I don’t recommend carrying a camera in a backpack because you will constantly be getting on and off rides and won’t be able to lean back on a bag with a camera in it. And I hope you like pictures of the inside of your camera bag because if you aren’t carrying your camera, you won’t use it.

4. Don’t Spend All Day Directing
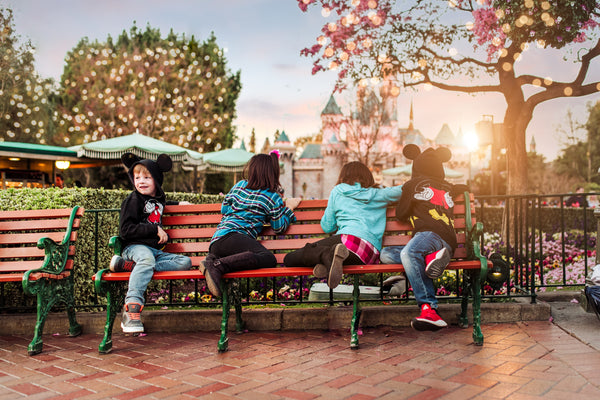
Stop making your kids look at you; I can’t find a better way to say it. Leave them be, let them wonder, let them stare off into space, make silly faces, and laugh. Then, take a picture quietly.
Your children will quickly tire of being told to look and smile, so quit trying to change them and change YOUR approach instead.
I promise you will love the shots where they aren’t looking at you!

5. Be Creative
Take photos of unexpected things. I know you probably have “The Shot” in mind, but be open to other opportunities.
This year I took photos INSIDE the rides, which I have never tried before. I took a bunch in Small World, Pirates, and the Buzz Lightyear Ride; they came out pretty cool, and I am surprised how much the kids love looking back at them.
You will definitely need to understand how to use manual mode to pull off these darker indoor shots, but if I can do it, so can you! Just remember to change your camera settings back to whatever your outdoor settings were after getting off the dark rides so you will be ready for your next shot.

6. Find Pockets of Space
Some of my shots look like we had the park to ourselves, but let me assure you, Disneyland was busy as all get out. You must have patience and find little pockets of space. If you wait for the perfect spot to reveal itself, you will be waiting all day.
Calm your mind, and find your spots. Do it in a happy way that makes the kids want to cooperate instead of run in the other direction. Keep it short and move on to the next ride!
Just like a regular session, morning and evening are best for shooting, so keep the harsher daylight hours to a minimum and plan the more essential shots during the golden hour or right after arriving in the morning.

7. Don’t Expect Every Photo to be Amazing
Don’t expect every shot to be award-winning! I took 537 photos on our last two-day trip and only posted about a dozen on my Facebook and Instagram pages. Don’t expect greatness from EVERY shot. Sometimes it’s just a memory or a moment that’s special to you, which is just fine. Find your dozen photo gems in the bunch and be happy with those.

8. Bonus Tip: Edit Your Photos
Last but not least, post-processing in Lightroom and/or Photoshop is a huge part of bringing Disney Magic to life!
I’m sure you will be exhausted from your trip, so give yourself a few days to recoup and relax before even looking through your photos. Then, after just a few days, they will remind you of the great time you had and will have a different feel to them than the day you came home.
Flag your favorites on the very first pass looking at them; your first instinct will usually always be correct.
I like to do my initial editing in Lightroom with my FAVORITE presets from Pretty Presets and then, if necessary, pop them over to Photoshop to add details like sky overlays, bokeh, or sun flare – click the links to find my favorites!

Conclusion
Disney is such a fun and magical family vacation that you will definitely want to document as much of it as possible. Give yourself some freedom to play and enjoy all the fun moments you can with your family – your kids will want you to be part of the action too.
If you miss capturing a moment, it isn’t the end of the world – there will be many more moments to capture. Hopefully, these tips will make the process fun and worthwhile for everyone!
Do you have any questions or comments about my Disney Photography Tips or any tips of your own that you would like to share with us? Leave us a comment below – we would LOVE to hear from you! And PLEASE SHARE our tutorial using the social sharing buttons – we really appreciate it!

Source link
Leave a Reply