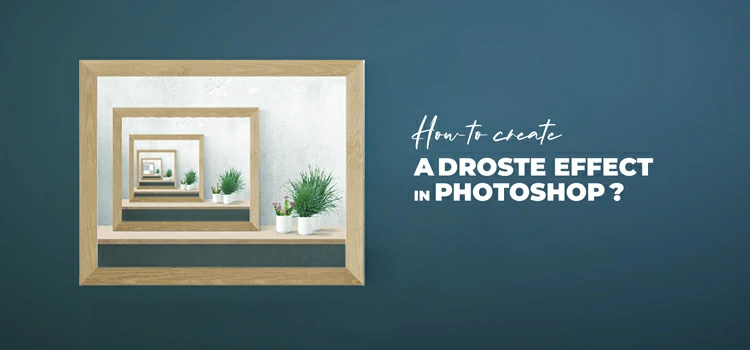
You must have noticed images that continue to repeat themselves endlessly. These recursive images show up mostly when the subject of an image holds an image frame. But these types of repetitive images can also be seen in other images.
When an image features its smaller version within itself and if continues in a loop infinitely, it’s called a Droste effect. And that’s exactly what the focal point is in this tutorial. With the help of Photoshop, we will walk you through how to create droste effect effortlessly.
Suggested Article– How to Create Retro Effect in Photoshop.
How to Create Droste Effect in Photoshop
If you search online, you will find several ways to create a droste effect in Photoshop. One of the ways shown in many tutorials is using a Photoshop plugin “Pixel Bender” to produce the droste effect in your image. But unfortunately, this plugin isn’t available now on Adobe’s website and it doesn’t work now.
Here, we will show the easiest method to create a droste effect in Photoshop —
Step-1: Open your Image in Photoshop
Right at the start, open the image in Photoshop on which you want to create droste effect. Then, unlock the background and proceed.

Step-2: Make a Selection in the Image
Now, make a selection in the area where you want the droste effect starts showing up. The aim is to make the area transparent by making selection with any Photoshop. We adopted the Quick Selection tool to make the selection.

However, you can make use of Pen tool, Magic Wand tool, etc. to make the selection as well.
Step-3: Add a Layer Mask
Now, add a mask to your layer by clicking the “Add Vector Mask” icon on the bottom of the layer panel. The area outside the selection will get transparent immediately after that.

Step-4: Inverse the Selection
Our goal is to make the area inside the selection transparent. So, for that, you need to inverse your selection. Hit Ctrl + I and the area inside the selection will get transparent.

Step-5: Create the 1st Version of Your Image
Now, copy your image layer to make the 1st smaller version of your image. Just press Ctrl + J to duplicate the image layer. Click Ctrl + T to apply free transform on your new image layer. Then, hold Shift and reposition the image inside the larger version.

Step-6: Create the 2nd Version of Your Image
Now, copy your 2nd image layer to make the 2nd smaller version of your image. Just press Ctrl + J to duplicate the image layer. Click Ctrl + T to apply free transform on the selected image layer. Then, hold Shift and reposition the image inside the previous larger version.

Step-7: Create the 3rd Version of the Image
Now, copy your 3rd image layer to make the 3rd smaller version of your image. Just press Ctrl + J to duplicate the image layer. Click Ctrl + T to apply free transform on the selected image layer. Then, hold Shift and reposition the image inside the previous larger version.

Step-8: Create the 4th Version of Your Image
Now, copy your 4th image layer to make the 4th smaller version of your image. Just press Ctrl + J to duplicate the image layer. Click Ctrl + T to apply free transform on the selected image layer. Then, hold Shift and reposition the image inside the earlier larger version.

Step-9: ‘Zoom in’ Image to View the Droste Effect
Before creating the final version of the image, take a look at the droste effect by zooming in all the created versions and also make sure your process is going smoothly.

Step-10: Create the 5th and Final Version of Image
Copy your 5th image layer to make the 5th smaller version of your image. Just press Ctrl + J to copy the image layer. Hit Ctrl + T to apply free transform on the selected image layer. Then, hold Shift and reposition the image inside the previous larger version.

Suggested Article– How to Add Cinematic Effect in Photoshop.
That was your final output. Bear in mind that there isn’t any hard and fast rule with regard to how many versions of your original image you should create. For this image, we have created 5 versions but depending on your image and the selected area of your image, number of versions may vary.
That’s all in this thrilling Photoshop tutorial on creating droste effect. Until we come up with another smashing tutorial, chill and enjoy your time!
Source link


Leave a Reply