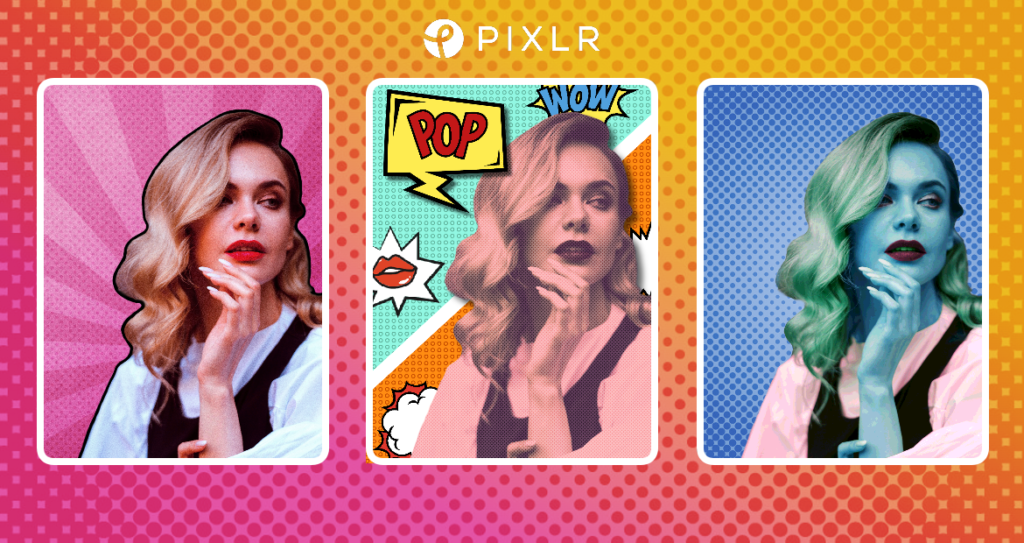
Pop art is a design trend that has recently gained popularity. It is characterized by bold colors, simple shapes, and recognizable imagery from popular culture.
One of the most recognizable elements of the pop art design is the use of bright, contrasting colors. This is often achieved through a limited color palette, such as primary colors or neon hues. The use of simple shapes and bold lines is a hallmark of pop art design. These elements are often combined to create striking and eye-catching imagery.
Pop art design often features recognizable imagery from popular culture. This can include anything from comic book characters and advertising icons to celebrities and political figures. These familiar images are intended to create a connection with the viewer and evoke a sense of nostalgia or familiarity.
In today’s tutorial, we’ll show you how to easily create your own pop art design in just a few steps using Pixlr.

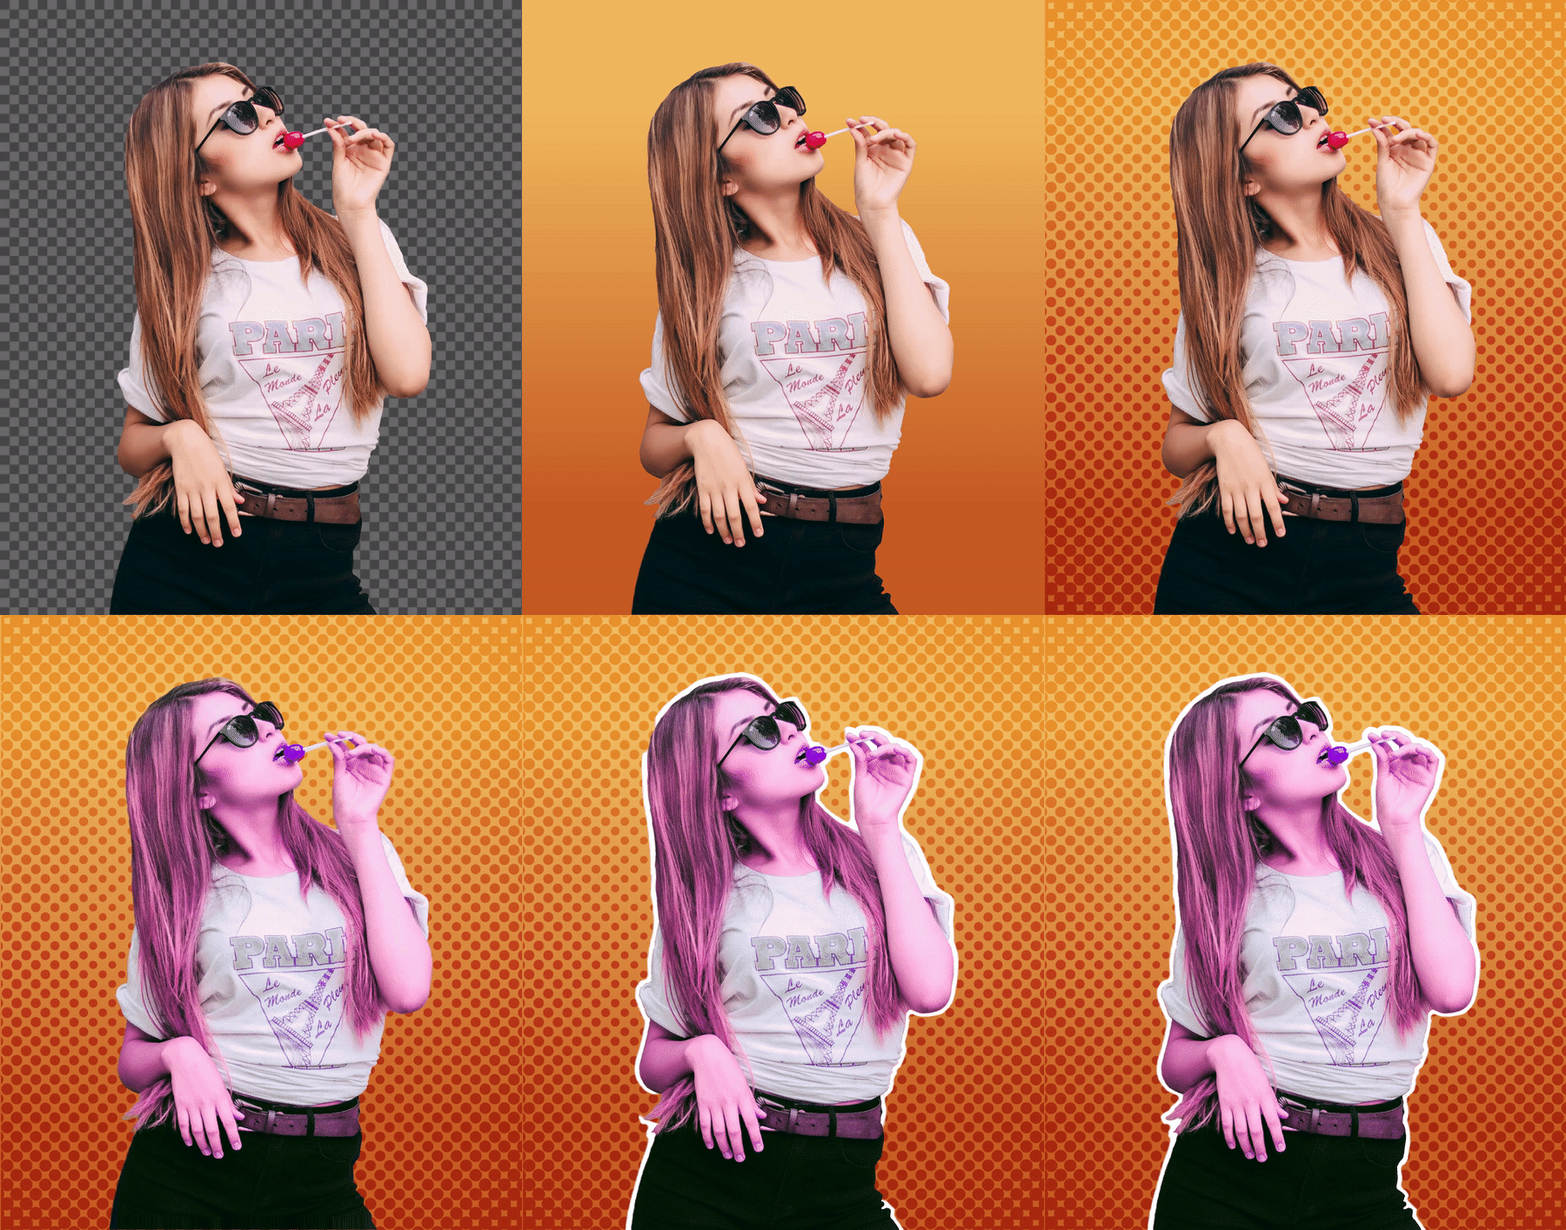
1. Remove background
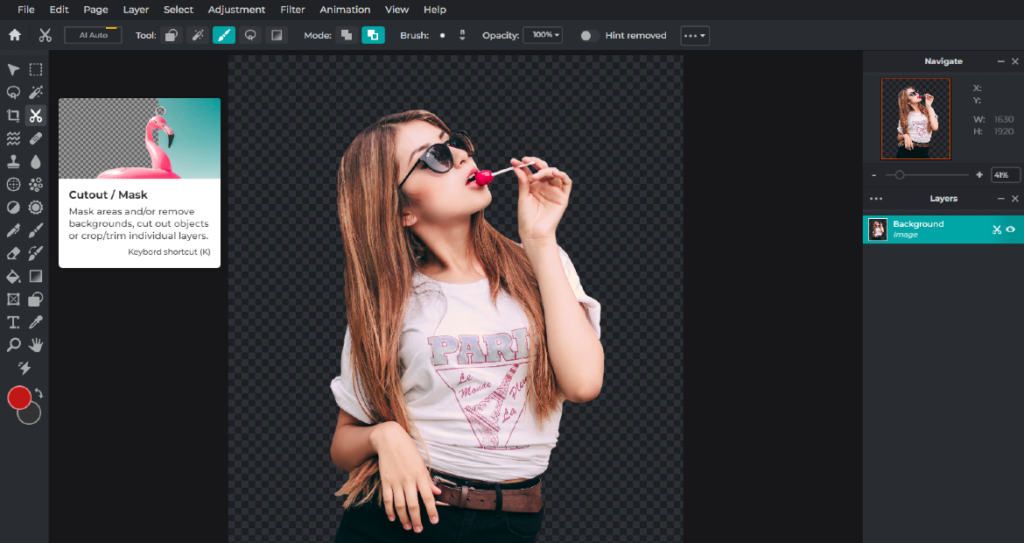 Remove the subject background using the A.I. Auto Mask tool, use Draw Mask tool to clean up the edges
2. Replace background
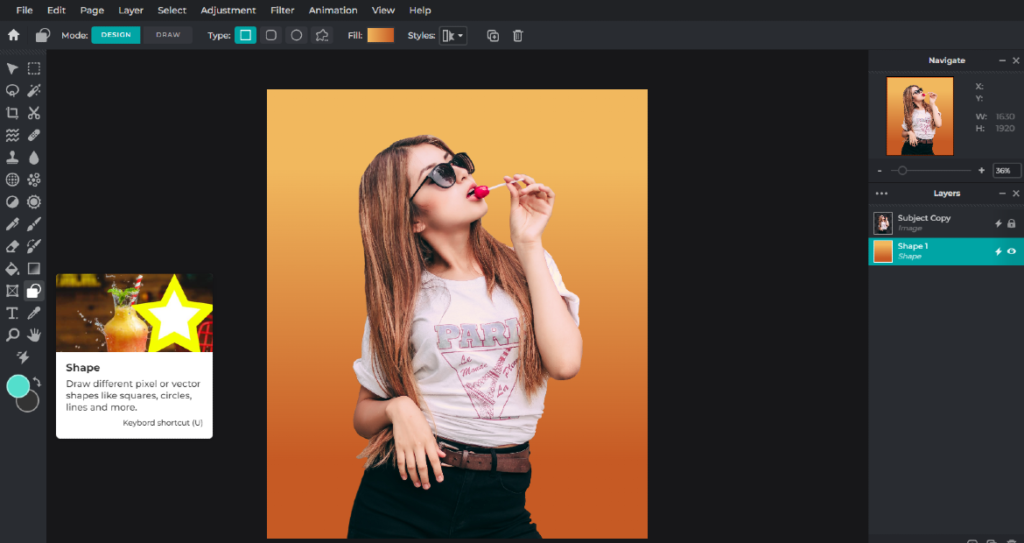 Replace the background using the Shape tool and select a color or color gradient of your choice
3. Add a halftone overlay
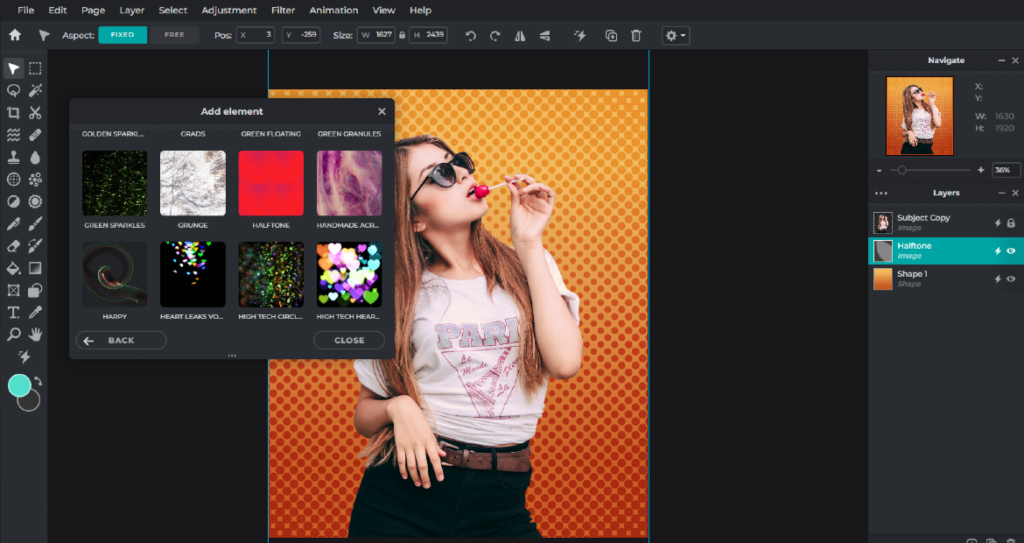 Under ‘add element layer’, add a halftone overlay by selecting Overlays, then Halftone
4. Adjust color & add effects
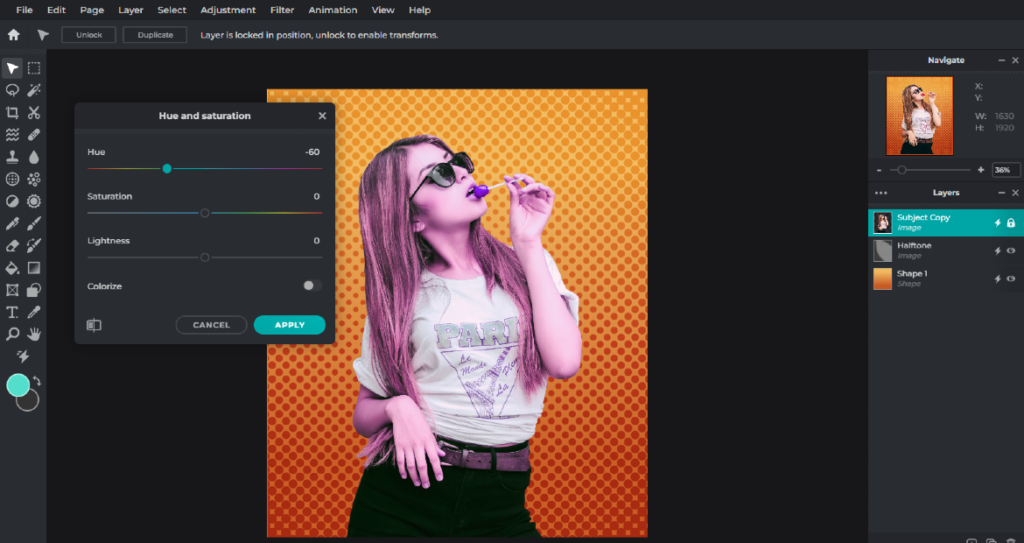 Add a few adjustments to the hue and saturation of the subject as well as adding other filters or effects
5. Add an outline
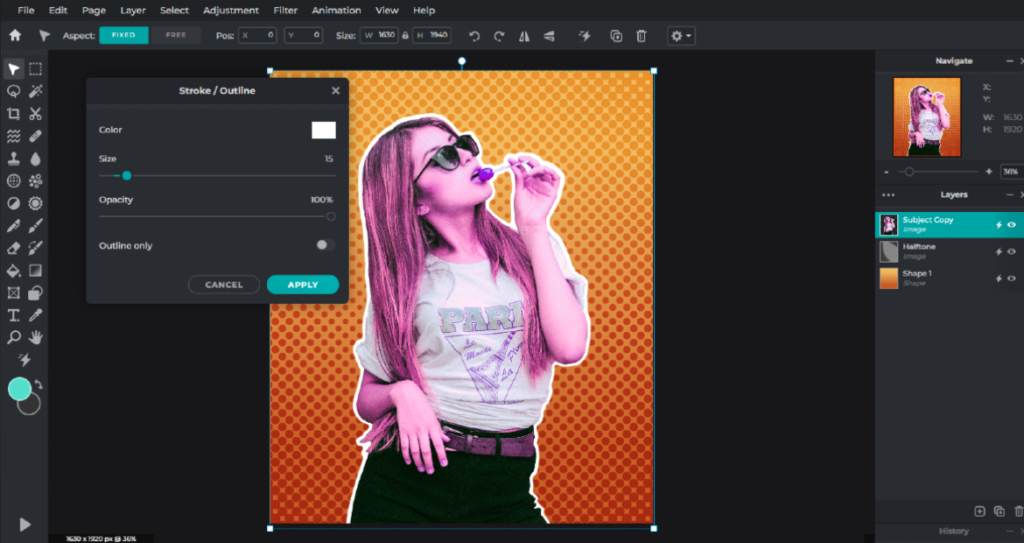 Under Filter, add an Outline to make the subject pop from the background
And you’re done!
Start Creating Cool Pop Art with Pixlr!
Now that you know these simple steps to creating fantastic and funky pop art designs, elevate your artwork further and get creative with Pixlr!
Source link


Leave a Reply